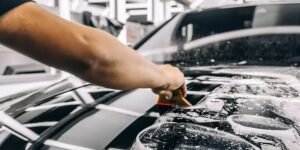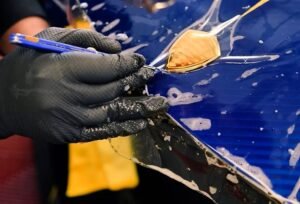
How to install PPF like a professional is one of the most common questions automotive enthusiasts ask. Paint protection film installation looks incredibly easy in 30-second social media clips—until you are stuck with trapped dust, stubborn bubbles, or fingers lifting at the edgesHow to install PPF like a professional is one of the most common questions automotive enthusiasts ask. Paint protection film installation looks incredibly easy in 30-second social media clips—until you are stuck with trapped dust, stubborn bubbles, or fingers lifting at the edges
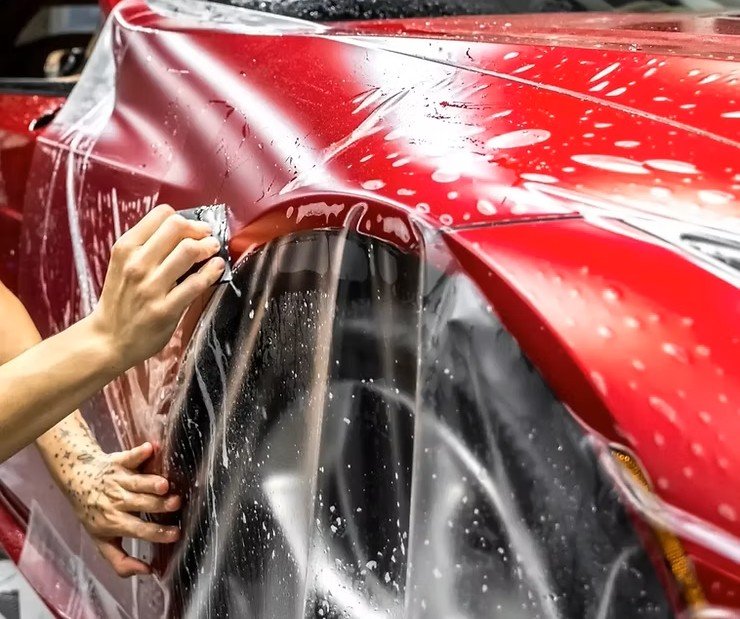
Can You Install PPF Yourself?
Yes, you can install PPF yourself, but it requires patience, a controlled environment, and high-quality material. If you are attempting a full hood, complex bumper, or large curved panels, prepare for a learning curve. You will need to master mixing the correct solutions, handling the film without static contamination, and squeegeeing out moisture without over-stretching the material.
MOKfilm Pro Tip: For small sections, flat panels, or pre-cut kits, a DIY install is highly achievable. However, premium films like MOKfilm TPU PPF feature advanced stretchability and a forgiving adhesive layer, making them significantly easier to reposition during installation than cheap PVC alternatives.
If you are aiming for a flawless, seamless full-car wrap, leaving it to a certified professional installer is usually the safest bet.
Ultimate PPF Installation Step-by-Step Guide
PPF installation isn’t beginner-level detailing, but with the right tools, clean technique, and meticulous preparation, you can achieve stunning results. Follow our proven 10-step process:
Step 1: Prepare the Surface (Decontamination)
A clean install requires surgically clean paint. To begin, start with a thorough two-bucket car wash. Following this, use a clay bar over the entire panel to remove embedded environmental contaminants. Your final step is a full wipe-down using an Isopropyl Alcohol (IPA) solution to eliminate any remaining wax, grease, or polish residue.
Start with a thorough two-bucket car wash.
Use a clay bar over the entire panel to remove embedded environmental contaminants.
Finish with a full wipe-down using an Isopropyl Alcohol (IPA) solution to eliminate any remaining wax, grease, or polish residue.
Any tiny speck of dust left behind will create a permanent bubble under your clear bra.
Step 2: Mix Your Installation Solutions
You must prepare two separate spray bottles before peeling the film:
Slip Solution: Mix 1 liter of distilled water with 2–3 ml of premium baby shampoo. This creates a slippery barrier, allowing you to slide and position the film freely.
Tack Solution: Mix 150 ml of 99% Isopropyl Alcohol (IPA) with 850 ml of distilled water. This flushes out the slip solution and activates the adhesive to lock the film down at corners and edges.
Step 3: Flood the Panel and Film
Generously spray the slip solution directly onto the car panel. As you peel the backing liner off the PPF, immediately spray the adhesive side with slip solution. This neutralizes static electricity and prevents airborne dust from sticking to the glue. Lay the wet film onto the surface.
Step 4: Align and Center the Film
With the film floating on the slip solution, precisely align it with the body lines and edges. Use your hands to smooth out major air pockets. If the film starts dragging or sticking too soon, lift it gently and respray more slip solution underneath. Do not use the squeegee until the alignment is perfect.
Step 5: Tack Key Anchor Points
Once aligned, lift a corner, spray the tack solution underneath to flush out the soap, and squeegee it down with moderate, even tension. Lock down all four corners first. This creates anchor points and stretches out any “fingers” or tension lines across the flat surfaces.
Step 6: Squeegee From the Center Out
Starting from the center of the panel, use a dedicated PPF squeegee to push the fluid outward using overlapping, controlled strokes.
Spray slip solution on top of the film to reduce squeegee friction and prevent scratching.
Pay close attention to recessed areas and body lines where moisture tends to trap.
Step 7: Handle Contamination Immediately
If you spot a piece of lint or dirt under the film, do not panic. Gently lift that section, flood it with slip solution, use your wet fingers to slide the debris out, and lay it back down. This is where the premium engineering of MOKfilm shines—our high-performance adhesive resists ghosting and adhesive lines even when lifted during installation.
Step 8: Trim and Wrap the Edges
For bulk installations, use a brand-new, ultra-sharp blade to trim away excess material, leaving about 1/4 inch for wrapping. Spray tack solution along the edges, let it tack up for a moment, and use a hard card or your thumb to tightly wrap and seal the film around panel gaps and corner
Step 9: Eliminate Leftover Moisture Bubbles
Small, faint pockets of moisture (water blisters) are normal and will evaporate through the breathable film over a few weeks. However, if you see a large bubble, you can use a fine needle or diabetic lancet to puncture it slightly and squeegee the moisture out.
Step 10: Final Heat Lock-in
Go over all wrapped edges, corners, and complex curves with a heat gun on a low-to-medium setting. The heat activates the post-cure bonding of the adhesive, ensuring the edges will never lift during high-speed driving or power washing. Let the vehicle cure indoors for at least 24 hours.
How Long Does It Take to Install PPF?
PPF installation time depends heavily on coverage and experience. Here is a realistic timeline breakdown for a DIYer vs. a Pro:
| Coverage Area | Estimated Installation Time |
| Small Panels (Mirrors, Headlights, Door Cups) | 30 – 60 Minutes |
| Full Hood or Front Bumper | 2 – 4 Hours |
| Full Front End (Hood, Bumper, Fenders, Mirrors) | 6 – 10 Hours |
| Full Vehicle Wrap | 15 – 25+ Hours |
Rushing the process is the number one cause of installation failure. Always block off plenty of time in a windless, dust-free garage.
When to Hire a Professional PPF Installer
While DIY clear bra kits are great for saving money on small sections, investing in a professional installation is highly recommended for full-body coverage. Indeed, if you are protecting a high-end luxury exotic or sports car, a certified shop is your best choice. Furthermore, you should opt for a pro if you do not have a closed, dust-free, temperature-controlled workspace. In addition, professional restyling shops utilize precise CNC plotting software to pre-cut templates perfectly tailored to your vehicle’s exact make and model, thereby minimizing the need for open-blade cutting on your paint.
Why Choose MOKfilm Paint Protection Film?
At MOKfilm, we manufacture next-generation aliphatic TPU (Thermoplastic Polyurethane) paint protection films engineered for both elite professional installers and automotive enthusiasts.
Advanced Self-Healing Technology: Swirl marks and minor surface scratches disappear automatically with exposure to sun heat or warm water.
Extreme Optical Clarity & High Gloss: MOKfilm enhances your factory paint depth, giving it a deep, wet-look finish without any “orange peel” texture.
Superior Yellowing Resistance: Formulated with UV-stabilized hydrophobic top-coats to withstand the harshest solar climates without discoloring or cracking.
Frequently Asked Questions (FAQs)
Is PPF better than a ceramic coating?
They serve entirely different purposes. PPF provides physical protection against rock chips, road debris, and deep scratches. Ceramic coatings offer chemical protection, slickness, and intense gloss, but cannot stop a flying rock. For ultimate protection, many enthusiasts apply a ceramic coating on top of MOKfilm PPF.
How long does MOKfilm PPF last?
When properly installed and maintained, a premium MOKfilm TPU wrap is designed to protect your vehicle for 5 to 10 years, backed by our robust resistance to staining, cracking, and yellowing.
Will removing PPF damage my factory paint?
No. As long as the film is removed correctly using a heat source/steam and the vehicle has original factory paint, PPF will peel off cleanly without leaving adhesive residue or lifting the clear coat.
How long should I wait to wash my car after installation?
We recommend waiting at least 48 to 72 hours after installation before washing your vehicle. This allows the film to fully cure and dry. When washing later, always keep high-pressure spray wands at least 12 inches away from the film edges.
Looking for premium bulk rolls or custom-cut paint protection solutions for your shop? [Contact the MOKfilm team today] to explore our latest TPU technology and elevate your vehicle protection standards.